
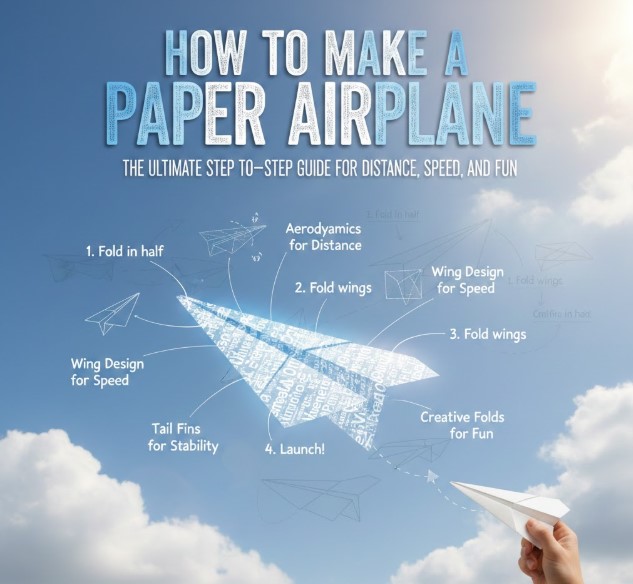
If you’ve ever folded a sheet of paper and launched it across a room, you already know the simple joy of flight. But if you’re searching for how to make a paper airplane that flies far, stays balanced, and looks impressive, you’re ready to go beyond basic folds. Paper airplanes are more than childhood fun—they’re hands-on lessons in aerodynamics, engineering, and creativity.
From classrooms to international competitions, paper aircraft have fascinated people for generations. Organizations like The Paper Airplane Guys and events such as the Red Bull Paper Wings showcase how design precision can dramatically influence flight distance and hang time. In fact, world record attempts have demonstrated paper airplanes flying over 200 feet under controlled conditions.
Understanding the Science Behind Paper Airplane Flight
Before diving into how to make a paper airplane step by step, it helps to understand why some designs soar while others nose-dive. Paper airplanes operate under the same four aerodynamic forces as real aircraft: lift, thrust, drag, and gravity.
Lift is generated when air moves over and under the wings. Thrust comes from your throw. Drag slows the airplane down, and gravity pulls it downward. The balance between these forces determines flight distance and stability.
• Wing Surface Area Influences Lift
Wider wings create more lift but also more drag. Narrow wings increase speed but reduce glide time. Understanding this trade-off is essential when deciding how to make a paper airplane that flies far.
• Center of Gravity Determines Stability
A plane with too much weight at the nose will dive quickly. If weight is too far back, it may stall. Proper folding ensures balanced distribution.
• Symmetry Is Critical
Even small differences in wing angle can cause spirals or crashes. Precision folding improves aerodynamics.
• Paper Weight Matters
Standard 80–100 GSM printer paper provides balance between stiffness and flexibility.
• Throwing Angle Affects Distance
A moderate upward angle (about 10–15 degrees) typically maximizes glide.
• Air Resistance Plays a Role
Smooth edges and tight folds reduce drag, improving efficiency.
Understanding these fundamentals helps you build not just any airplane—but one engineered for performance.
Also Read:- How to Cut a Mango: The Complete Step-by-Step Guide for Perfect Slices and Cubes
How to Make a Paper Airplane Step by Step (Classic Dart Design)
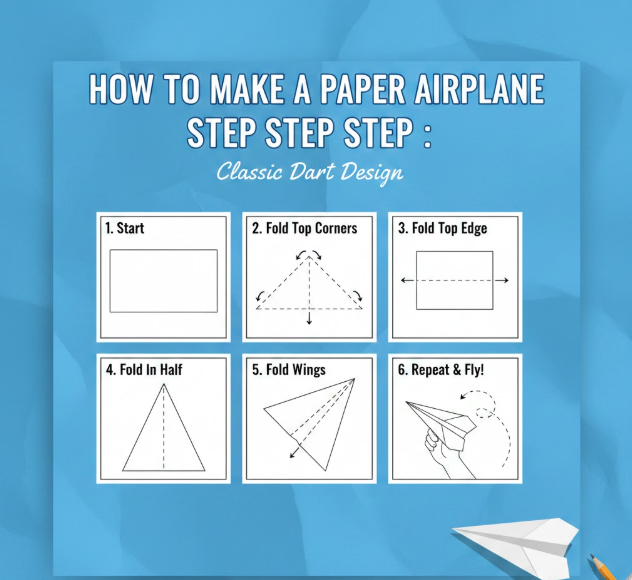
If you’re learning how to make a paper airplane easy and fast, the classic dart design is perfect.
• Start with Standard Letter or A4 Paper
Place the paper vertically on a flat surface. Crease sharply to ensure accuracy from the first fold.
• Fold Paper in Half Lengthwise
Create a strong center crease, then reopen. This acts as your alignment guide.
• Fold Top Corners to the Center Line
Bring both top corners inward to meet at the crease. Ensure symmetry.
• Fold Edges Again Toward Center
Repeat the process to create a sharper nose.
• Fold Entire Plane in Half
Align edges carefully and crease firmly.
• Create Wings by Folding Down Both Sides
Make wings symmetrical. Your basic dart is ready to fly.
This model emphasizes speed and distance, making it ideal for indoor flights.
Also Read:- How to Meditate Properly: The Complete Beginner-to-Advanced Guide
How to Make a Paper Airplane That Flies Far

When aiming for distance, structural precision becomes crucial.
• Reinforce the Nose
Add a small fold at the tip to increase forward weight. This stabilizes long glides.
• Widen the Wings Slightly
Broader wings increase lift, supporting extended flight time.
• Ensure Tight Creases
Loose folds create turbulence and drag.
• Add Winglets (Small Upward Tips)
These improve stability and reduce side drift.
• Launch with Controlled Force
Too much power can cause instability; smooth thrust works best.
• Test and Adjust
Minor wing angle adjustments can dramatically improve performance.
Design refinement is key when mastering how to make a paper airplane that goes far.
Also Read:- How to Do a Squat: The Ultimate Step-by-Step Guide for Perfect Form and Powerful Results
How to Make a Paper Airplane Jet
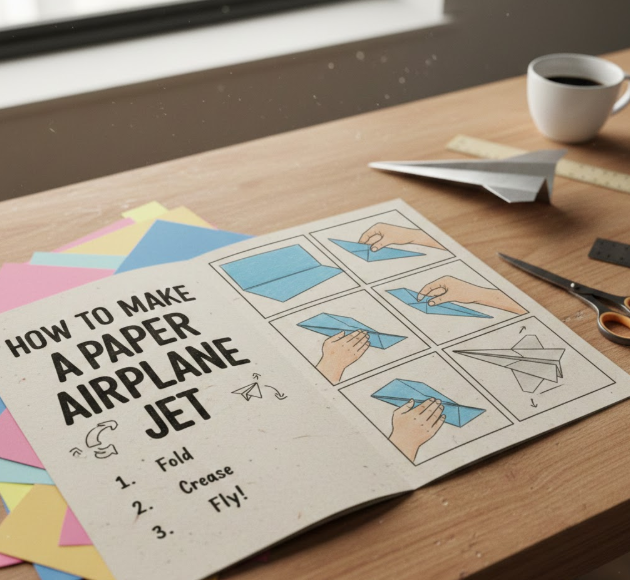
Jet-style airplanes emphasize speed and sleekness.
• Create a Narrow Body
Fold edges inward multiple times to reduce width.
• Sharpen the Nose
A pointed nose cuts through air efficiently.
• Fold Smaller Wings
Short wings reduce drag, increasing speed.
• Keep Wings Slightly Angled Upward
This supports lift despite reduced surface area.
• Maintain Perfect Symmetry
Jet designs are sensitive to imbalance.
• Use Quick, Firm Launches
Jets perform best with confident throws.
Jet models are ideal for racing-style competitions or classroom demonstrations.
Also Read:- How to Delete Instagram Account: The Complete 2025 Step-by-Step Guide
How to Make a Paper Airplane Easy and Fast for Beginners
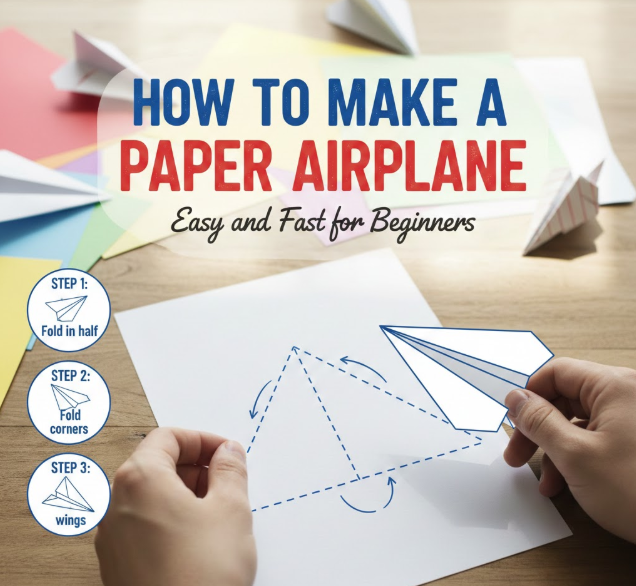
If teaching children or beginners, simplicity matters.
• Choose Basic Dart Design
Minimizes complexity and confusion.
• Use Thicker Paper for Durability
Prevents tearing during repeated flights.
• Explain Each Fold Clearly
Demonstrate before students attempt.
• Encourage Gentle Throws
Avoid overwhelming force.
• Focus on Fun, Not Perfection
Learning through experimentation builds interest.
• Allow Creative Decoration
Personalization enhances engagement.
Also Read:- How to Store Potatoes: The Complete Expert Guide for Freshness, Flavor, and Long-Term Storage
How to Make a Paper Airplane for Kids
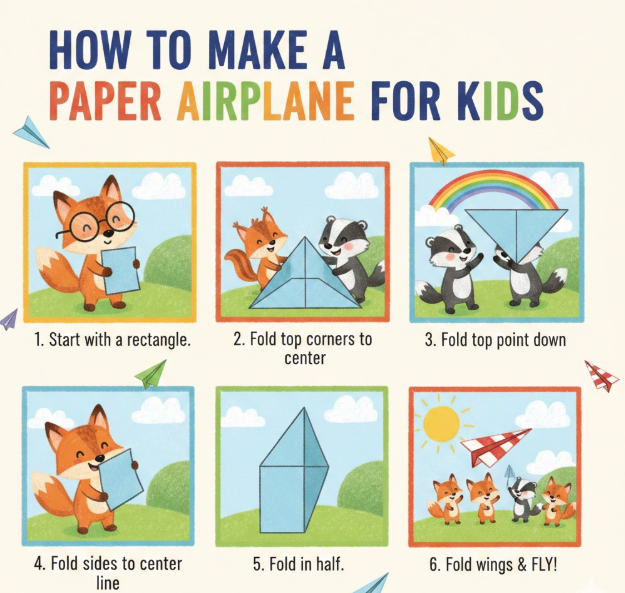
When designing for children, safety and accessibility are priorities.
• Avoid Sharp Points
Fold nose slightly to soften edges.
• Use Lightweight Paper
Makes throwing easier for small hands.
• Teach About Aerodynamics Simply
Explain lift as “air holding the plane up.”
• Keep Instructions Visual
Step-by-step guidance helps comprehension.
• Practice in Open Spaces
Avoid obstacles or fragile objects.
• Encourage Experimentation
Kids learn best by adjusting wings and observing changes.
Also Read:- How to Read Palms: Complete Beginner’s Guide to Palm Reading, Lines, and Meanings
Advanced Techniques to Improve Flight Distance
Once you understand how to make a paper airplane correctly, advanced tweaks can elevate performance.
• Add Paper Clips for Weight Adjustment
Subtle nose weight improves glide stability.
• Experiment with Wing Dihedral Angle
Slight upward tilt enhances balance.
• Smooth Out Creases
Ironing folds gently (without heat damage) reduces drag.
• Trim Excess Paper
Streamlined edges improve aerodynamics.
• Test Indoors vs Outdoors
Wind conditions affect performance.
• Record Flight Data
Measure distance to track improvements.
Also Read:- How to Tie a Tie: The Complete Step-by-Step Expert Guide
Conclusion
Learning how to make a paper airplane is both an art and a science. By understanding aerodynamic forces, applying precise folding techniques, and experimenting with design variations, you can create planes that glide smoothly, fly far, and inspire curiosity. Whether building a jet-style model for speed or a wide-wing glider for distance, attention to symmetry, balance, and launch technique determines success.
From classrooms to competitions, paper airplanes demonstrate how small adjustments produce measurable differences. With practice and creativity, you can refine your design into a high-performance flyer that consistently outperforms basic folds.
FAQs
What type of paper works best?
Standard printer paper balances weight and flexibility.
Why does my plane nose-dive?
It may be nose-heavy or thrown too steeply.
How can I make it fly farther?
Improve symmetry, adjust wing angle, and refine throwing technique.
Is thicker paper better?
Not always. Heavier paper increases weight and may reduce glide.
Can I use colored paper?
Yes, but ensure it has similar thickness to standard paper.
For More Updates Visit: Biomagazine