

Flushing a water heater is one of the most overlooked yet essential home maintenance tasks. If you’ve ever noticed reduced hot water pressure, strange popping sounds, or rising energy bills, sediment buildup inside your tank is often the hidden cause. Learning how to flush water heater systems correctly can extend appliance lifespan, improve efficiency, and save hundreds of dollars in energy and repair costs.
According to the U.S. Department of Energy, sediment accumulation can reduce water heater efficiency by up to 50%, especially in areas with hard water. This in-depth guide explains how to flush a water heater safely and effectively in different locations and configurations—gas, electric, attic, basement, camper, and more—using expert-backed methods homeowners can trust.
Why Flushing a Water Heater Is Critical for Performance and Safety
Water heaters continuously heat mineral-rich water. Over time, calcium and magnesium settle at the bottom of the tank, forming sediment that traps heat and stresses internal components.
Regular flushing:
- Improves heating efficiency
- Reduces noise and overheating
- Extends tank lifespan
- Prevents corrosion and leaks
- Maintains consistent hot water supply
Most manufacturers and plumbing experts recommend flushing once per year, or every 6 months in hard-water regions.
Also Read:- How to Grow Asparagus: A Complete Step-by-Step Guide for Beginners and Experts
How to Flush Water Heater Steps (Universal Process Explained)
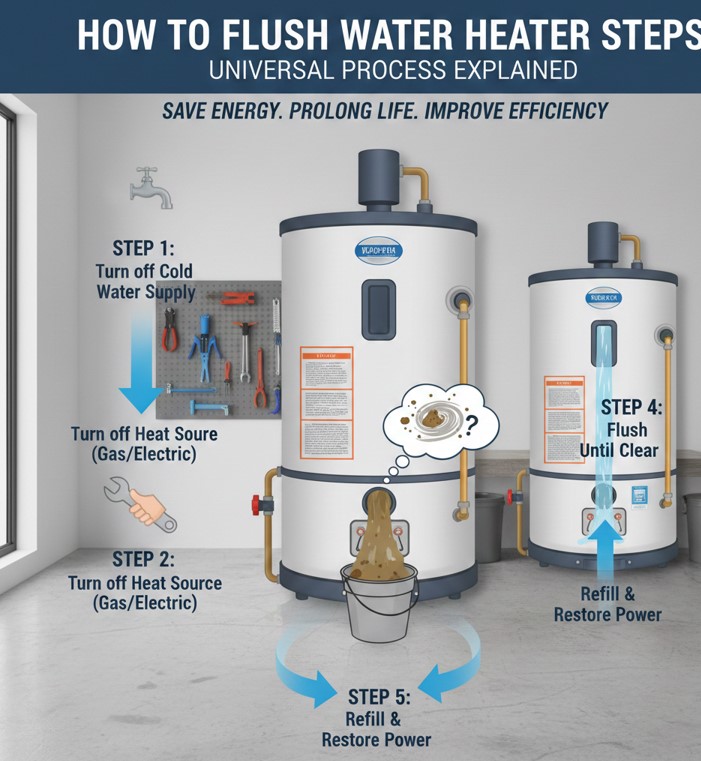
Understanding the general flushing procedure provides a foundation that applies to all heater types and locations.
Definition and Purpose
Flushing removes sediment and mineral buildup from inside the tank by draining water through the drain valve using gravity and water pressure.
Essential Step-by-Step Principles
• Power and Fuel Shutoff
Always turn off electricity at the breaker or gas at the control valve before flushing. This prevents dry firing, which can permanently damage heating elements or burners.
• Cold Water Inlet Control
Shutting off the cold-water supply stops new water from entering the tank, allowing sediment to settle and drain effectively.
• Pressure Relief Valve Activation
Opening a hot water tap or pressure relief valve prevents vacuum lock and allows smooth drainage.
• Drain Valve Connection
A garden hose attached to the drain valve directs sediment-filled water safely away from flooring or foundations.
• Full Tank Drainage
Allow all water to exit until flow stops, ensuring heavy debris leaves the tank bottom.
• System Refill and Restart
Once flushing is complete, refill the tank fully before restoring power or gas to avoid damage.
Also Read :- How to Stop Sneezing: A Complete, Doctor-Reviewed Guide for Instant and Long-Term Relief
How to Flush Water Heater Tank Properly
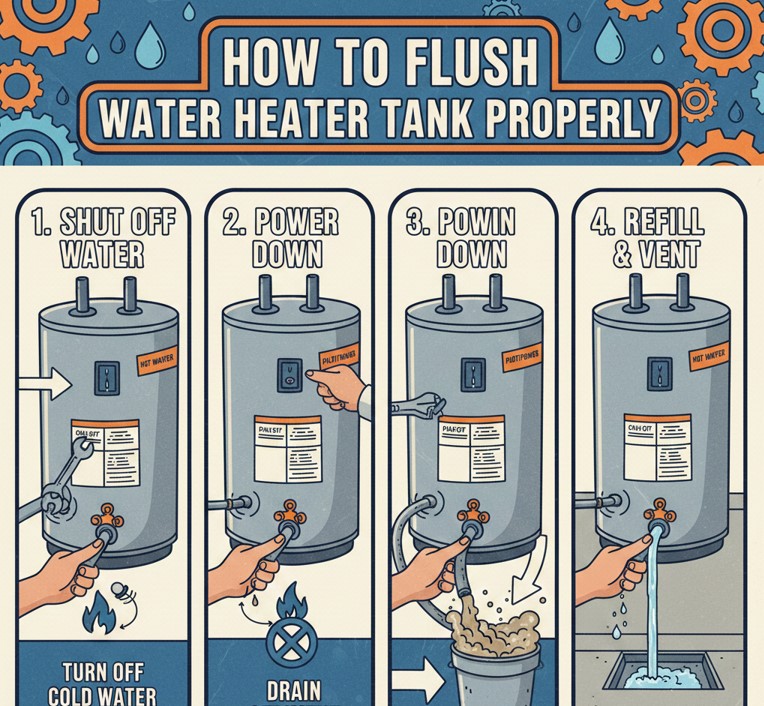
Flushing the entire tank focuses on removing heavy sediment layers that accumulate over months or years.
Tank Flushing Explained
Tank flushing clears debris that settles at the bottom and insulates heat sources, causing inefficiency.
Key Tank-Flushing Points
• Visual Water Inspection
Cloudy or rusty water indicates mineral concentration and corrosion.
• Drain Valve Maintenance
Old drain valves can clog; opening slowly reduces blockage risk.
• Multiple Flush Cycles
Refilling and draining twice improves sediment removal in older tanks.
• Temperature Adjustment
Lowering thermostat settings reduces scalding risk during flushing.
• Anode Rod Awareness
Sediment accelerates anode rod decay, increasing corrosion risk.
• Post-Flush Leak Check
Inspect valves and fittings before restoring operation.
Also Read:- How to Get Rid of Carpenter Bees: The Complete Expert Guide
How to Flush Water Heater Sediment Effectively
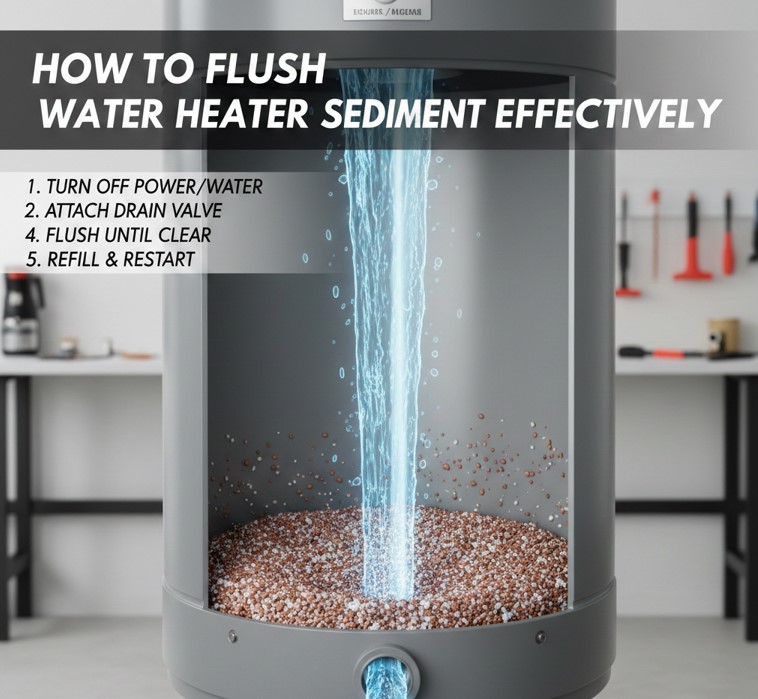
Sediment-specific flushing focuses on mineral buildup rather than full tank drainage.
Sediment Removal Defined
Sediment consists of dissolved minerals that crystallize when heated repeatedly.
Practical Sediment-Flushing Insights
• Hard Water Considerations
Homes with hard water require more frequent flushing due to rapid mineral accumulation.
• Noise Reduction Benefits
Sediment causes popping sounds as trapped water flashes into steam.
• Energy Efficiency Improvement
Removing sediment restores direct heat transfer.
• Partial Flush Technique
Short, controlled flushes reduce disruption while maintaining performance.
• Filter Integration
Whole-house water softeners reduce future sediment formation.
• Long-Term Cost Savings
Reduced wear extends heater life by several years.
Also Read:- How to Shrink Jeans: A Complete, Expert-Backed Guide for Perfect Fit
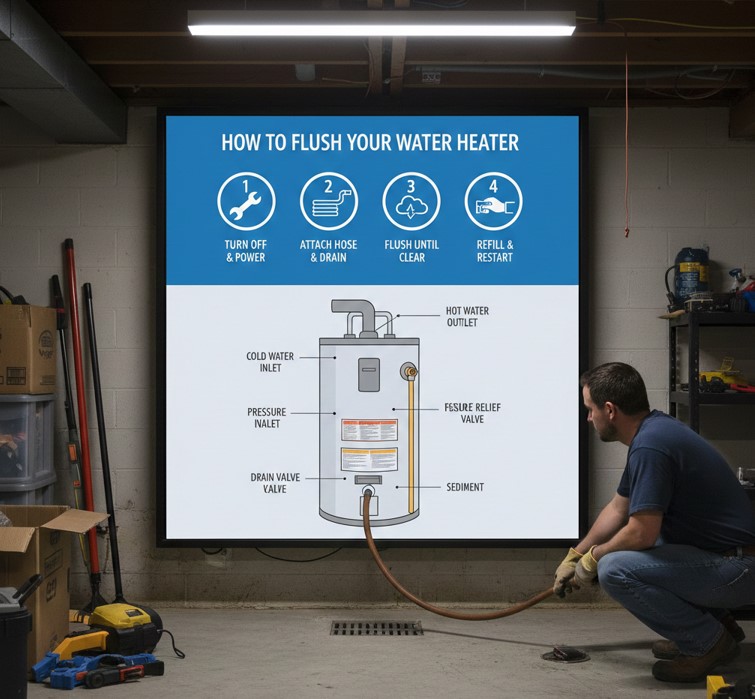
How to Flush Water Heater with Garden Hose

Using a garden hose is the safest and most common flushing method.
Hose-Based Flushing Explained
A standard garden hose channels hot water and debris away from living spaces.
Best Practices
• Heat-Resistant Hose Selection
Ensure the hose can handle hot water safely.
• Downhill Drainage Path
Gravity improves sediment evacuation.
• Secure Hose Connection
Loose fittings cause leaks and burns.
• Outdoor Discharge Location
Avoid draining onto lawns with high mineral sensitivity.
• Valve Operation Control
Open slowly to prevent sudden pressure surges.
• Post-Flush Hose Inspection
Flush the hose separately to prevent mineral buildup.
Also Read:- How to Get Oil Stains Out of Clothes Complete Expert Guide
How to Flush Water Heater in Basement
Basement installations require careful drainage planning.
Basement-Specific Challenges
Limited gravity flow and floor drain access influence flushing strategy.
Key Basement Considerations
• Floor Drain Accessibility
Ensure drains are clear before starting.
• Sump Pump Coordination
Heavy sediment may clog sump systems.
• Moisture Control
Use towels or trays to prevent water damage.
• Ventilation Awareness
Humidity increases during flushing.
• Cold Climate Risks
Prevent frozen discharge lines in winter.
• Foundation Protection
Direct water away from walls.
Also Read:- How to Ripen Bananas: The Ultimate Guide to Fast and Natural Ripening Methods
How to Flush Water Heater in Attic

Attic installations require added safety precautions.
Attic Flushing Explained
Elevated heaters pose leak and overflow risks.
Attic-Specific Points
• Drain Pan Inspection
Confirm pan drains are functional.
• Secondary Drain Path
Always use a hose, never free drain.
• Weight and Movement Safety
Avoid leaning or shifting the tank.
• Ceiling Damage Prevention
Monitor water flow continuously.
• Code Compliance Awareness
Many local codes require professional service.
• Extra Leak Detection
Check ceilings below after flushing.
Also Read: How to Get Rid of Cockroaches: The Complete, Proven Guide for Permanent Control
How to Flush Water Heater Gas
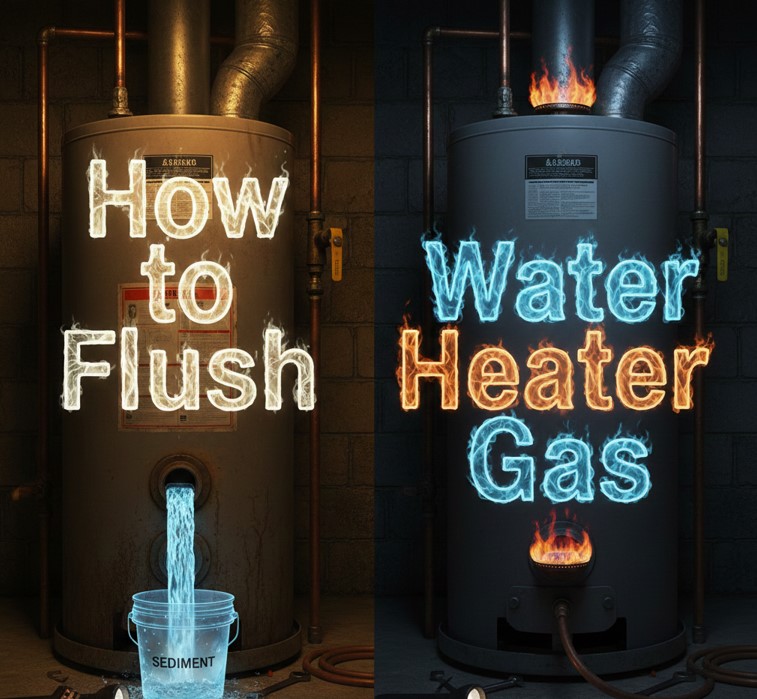
Gas heaters require additional combustion safety steps.
Gas Heater Flushing Defined
Gas systems rely on burners that must remain protected from dry firing.
Gas-Specific Guidelines
• Pilot Light Management
Set control to “pilot” or “off.”
• Ventilation Safety
Ensure exhaust paths remain clear.
• Burner Protection
Never ignite burner in empty tank.
• Gas Valve Inspection
Check for leaks after restarting.
• Sediment Impact on Burners
Sediment causes uneven heating.
• Carbon Monoxide Awareness
Improper operation increases CO risk.
Also Read:- How to Fold a Pocket Square: The Complete Gentleman’s Guide to Timeless Style
How to Flush Water Heater Electric
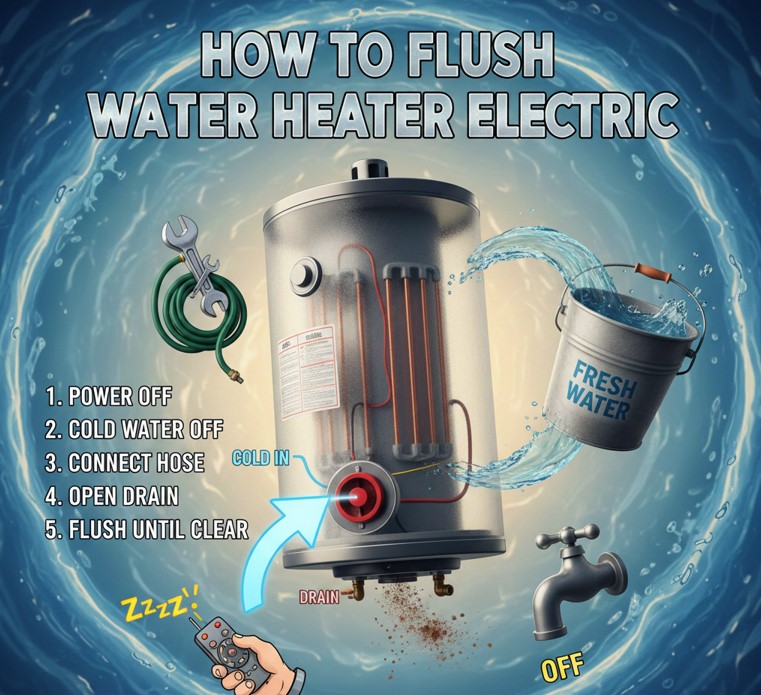
Electric heaters require breaker-level precautions.
Electric Flushing Explained
Electric elements burn out instantly if exposed without water.
Electric Heater Essentials
• Breaker Shutoff Verification
Double-check power is off.
• Element Protection
Never restore power before full refill.
• Element Cleaning Opportunity
Sediment coats heating elements.
• Thermostat Reset Check
Ensure correct temperature after restart.
• Energy Efficiency Recovery
Clean elements heat faster.
• Electrical Safety Compliance
Dry hands and tools only.
How to Flush Water Heater in Camper
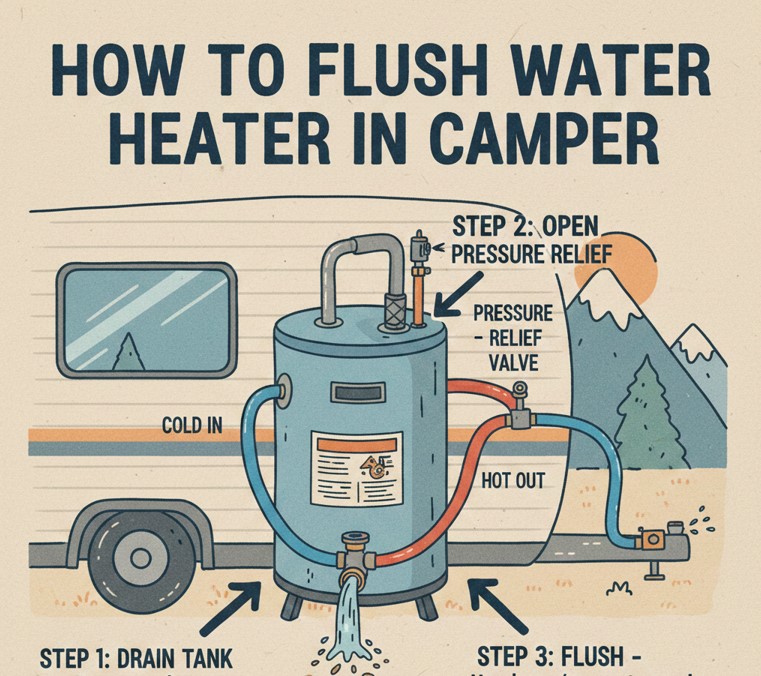
Campers use compact, sensitive water heating systems.
RV Flushing Explained
Campers often have bypass valves and smaller tanks.
Camper-Specific Insights
• Bypass Valve Activation
Prevents antifreeze contamination.
• Lower Pressure Handling
RV systems operate differently.
• Frequent Maintenance Need
Travel water quality varies.
• Lightweight Sediment Risks
Even small buildup impacts output.
• Seasonal Storage Flushing
Flush before winterizing.
• Portable Hose Use
Dedicated RV hoses prevent contamination.
Conclusion
Learning how to flush water heater systems properly is one of the simplest ways to protect your home, reduce energy costs, and extend appliance lifespan. Whether your unit is gas or electric, in a basement, attic, camper, or tank system, regular flushing prevents sediment damage and ensures reliable hot water year-round. A single hour of maintenance each year can prevent thousands in repairs.
FAQs
How often should I flush my water heater?
Once per year; every 6 months in hard-water areas.
Can flushing damage my heater?
No—when done correctly, it prevents damage.
Is professional flushing necessary?
DIY is safe for most homeowners; professionals help with older units.
For More Updates Visit: Biomagazine