

Gel X nails have become one of the most popular nail enhancement systems in recent years, praised for their lightweight feel, natural appearance, and long-lasting results. However, when it comes time for removal, many people feel uncertain, worried about nail damage, or tempted to peel them off—often leading to weakened, brittle nails. Understanding how to remove Gel X nails correctly is essential for maintaining healthy natural nails and avoiding long-term damage.
This comprehensive guide explains how to remove Gel X nails at home, with or without acetone, tools, or drills, while prioritizing nail safety. Drawing from professional nail care practices and expert-backed techniques, this article provides everything you need to remove Gel X nails safely, gently, and effectively, even if you are a beginner.
What Are Gel X Nails and Why Proper Removal Matters
Gel X nails are a soft gel nail extension system that is cured under a UV or LED lamp and bonded to the natural nail using gel adhesive. Unlike acrylics, Gel X extensions are designed to soak off rather than be forcibly removed. Proper removal is crucial because the natural nail plate is delicate, layered, and easily damaged by excessive force.
Removing Gel X nails incorrectly—such as peeling, ripping, or over-filing—can strip away layers of keratin, leading to thin nails, peeling, sensitivity, and slow regrowth. Learning the correct removal process helps preserve nail strength, prevent breakage, and support long-term nail health.
How to Remove Gel X Nails at Home

Removing Gel X nails at home requires patience, preparation, and the right technique. This method closely follows professional salon practices while being accessible to non-professionals. The goal is to allow the gel to break down gradually instead of forcing it off.
Detailed Explanation
This at-home Gel X removal method relies on controlled soaking and gentle lifting to dissolve the gel adhesive safely. It works best when done slowly, allowing the product to release naturally from the nail plate. Proper preparation reduces removal time and minimizes damage.
Step-by-Step Build Points
• Prepare your nails properly before removal
Start by trimming the length of the Gel X extensions using nail clippers. Shortening the nails reduces leverage and stress on the natural nail. Lightly buff the top coat and seal layer to break the surface, which helps any soaking solution penetrate more effectively.
• Soak the nails using a controlled method
Soaking helps soften the gel layers and adhesive. Wrap each nail with a soaked cotton pad and secure it with foil or clips. Keep hands warm during soaking, as heat accelerates the breakdown process and improves results.
• Gently push off loosened gel layers
After soaking, use a wooden cuticle stick to softly nudge the gel from the edges. If the gel resists, stop immediately and soak longer. Forced removal causes nail plate trauma and surface peeling.
• Repeat soaking as needed
Some Gel X systems require multiple soak cycles. Patience is essential. Rushing this step increases the risk of nail thinning and surface damage.
• Smooth the nail surface carefully
Once the gel is removed, lightly buff remaining residue with a fine-grit buffer. Avoid aggressive filing, as natural nails are already more vulnerable post-removal.
• Restore moisture and strength
Finish with cuticle oil and a strengthening treatment. Hydration helps replenish lost moisture and supports healthy nail recovery.
Also Read:- How to Reset CMOS: A Complete Beginner-to-Advanced Guide
How to Remove Gel X Nails Without Acetone

Removing Gel X nails without acetone is a popular choice for individuals with sensitive skin, allergies, or dryness concerns. While acetone is effective, non-acetone methods focus on gentle softening and mechanical release.
Detailed Explanation
Non-acetone removal relies on warm water, oils, and extended soaking to weaken the gel bond gradually. Although this method takes longer, it significantly reduces dryness and irritation while still allowing safe removal when done correctly.
Step-by-Step Build Points
• Use warm water and natural oils
Combine warm water with cuticle oil, olive oil, or coconut oil. The warmth helps expand the gel, while oils penetrate the adhesive layers to loosen the bond over time.
• Soak nails for extended periods
Unlike acetone, non-acetone methods require longer soaking sessions. Allow nails to soak for 30–45 minutes, reheating the water as needed to maintain effectiveness.
• Lift gently from the cuticle area
After soaking, use a wooden stick to gently test the edges near the cuticle. The gel should begin lifting naturally without resistance.
• Avoid metal tools
Metal pushers increase the risk of scraping and gouging the nail plate. Always use soft, wooden tools when removing Gel X without acetone.
• Re-soak instead of forcing removal
If the gel does not lift easily, re-soak rather than applying pressure. Slow release prevents nail damage.
• Rehydrate nails immediately afterward
Non-acetone methods are gentler, but nails still need nourishment. Apply cuticle oil and a nail repair serum to restore balance.
Also Read:- How to Replace a Kitchen Faucet: A Complete Step-by-Step DIY Guide
How to Remove Gel X Nails at Home Without Tools
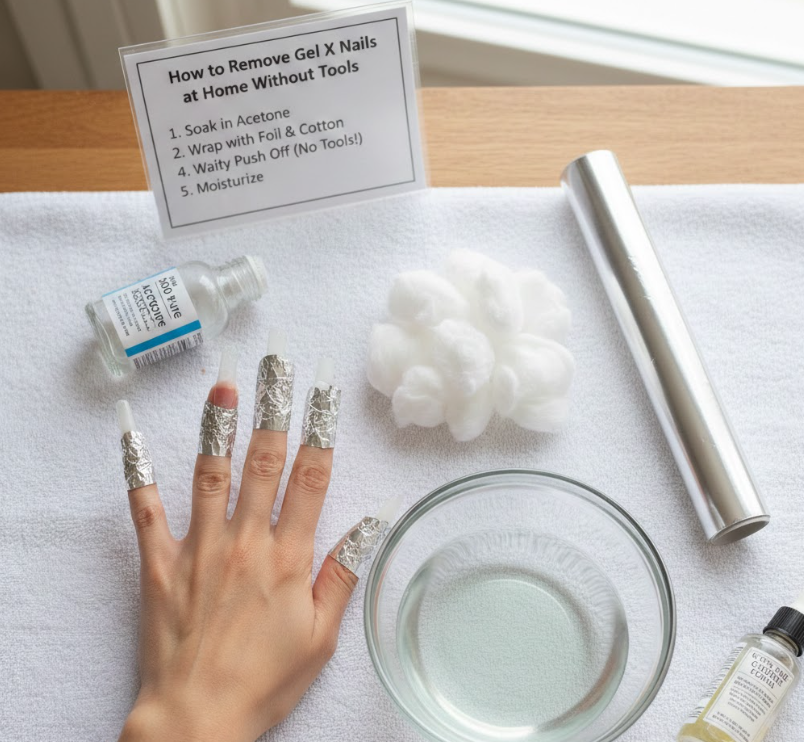
Removing Gel X nails without tools may seem challenging, but it is possible using household items and a careful approach. This method prioritizes safety over speed.
Detailed Explanation
This approach uses heat, moisture, and patience rather than mechanical force. It is ideal for individuals who lack nail tools or prefer a minimalist method while still protecting nail health.
Step-by-Step Build Points
• Trim nails carefully using household clippers
Reducing length decreases stress on the nail bed and helps soaking solutions work more effectively.
• Create a warm soak environment
Use warm water mixed with oil or gentle soap. Heat softens the gel layers and encourages separation from the natural nail.
• Use natural lifting pressure
After soaking, gently use your fingers to apply slight pressure near the cuticle. Never peel or rip the gel off.
• Repeat soaking cycles patiently
Tool-free removal takes time. Multiple soak sessions may be necessary for full release.
• Let gravity and moisture do the work
The gel should loosen gradually. Any pain or resistance indicates the need for more soaking.
• Finish with intensive hydration
Apply a thick layer of cuticle oil or hand cream to replenish moisture lost during soaking.
Also Read:- How to Get Rid of Gnats: The Complete Expert Guide for Home, Plants, and Outdoors
How to Remove Gel X Nails Without Damage
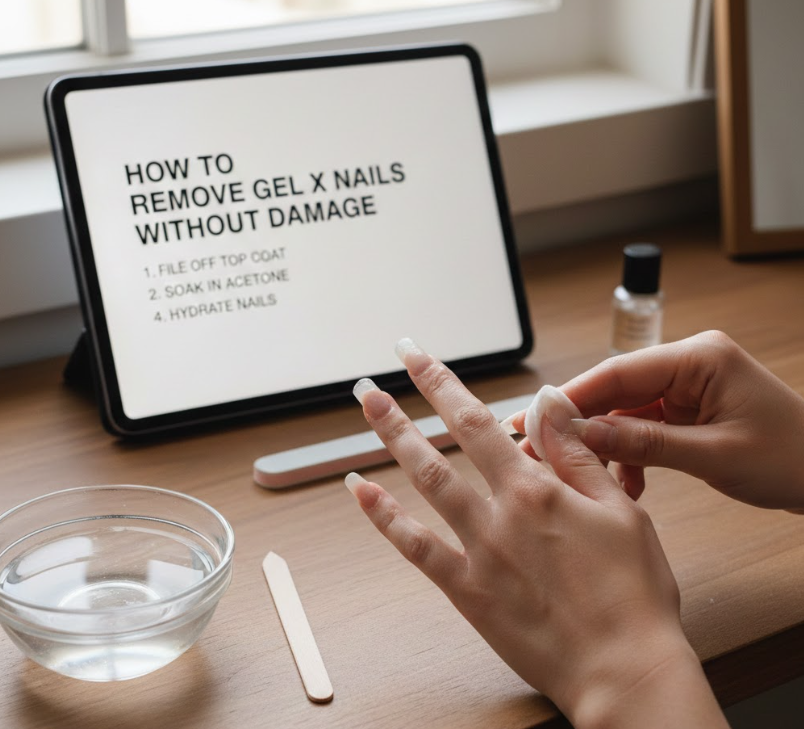
Preventing damage is the most important aspect of Gel X nail removal. Healthy nails depend on proper technique, patience, and aftercare.
Detailed Explanation
Damage typically occurs when nails are peeled, over-filed, or forced. This method focuses on preserving the nail plate and supporting natural regrowth through gentle removal and nourishment.
Step-by-Step Build Points
• Never peel or pry off Gel X nails
Peeling removes layers of keratin, weakening the nail structure and causing long-term thinning.
• Soften before lifting
Always soften gel using soaking methods before attempting removal. Soft gel releases naturally when properly broken down.
• Use minimal pressure
If resistance is felt, stop immediately. Pressure causes micro-tears in the nail plate.
• Limit buffing to surface smoothing
Excessive buffing thins nails and increases sensitivity. Use a fine buffer only when necessary.
• Rebuild nail strength post-removal
Apply nail strengtheners containing keratin or biotin to support recovery.
• Maintain hydration daily
Cuticle oil and hand cream restore flexibility and prevent peeling after removal.
Also Read:- How to Clear Cache on iPhone: A Complete, Expert-Backed Guide
How to Remove Gel X Nails Without Drill

Removing Gel X nails without an electric drill is safer for home users and reduces the risk of heat damage or over-filing.
Detailed Explanation
Manual methods rely on soaking and gentle lifting rather than mechanical abrasion. This approach mirrors professional soak-off techniques used in salons.
Step-by-Step Build Points
• Lightly buff the top layer manually
Breaking the seal allows soaking solutions to penetrate the gel layers more effectively.
• Use soaking as the primary removal method
Soaking dissolves adhesive bonds without grinding down the nail surface.
• Lift gel gently once softened
Gel should slide off easily when fully softened. Never scrape aggressively.
• Repeat soaking rather than forcing removal
Multiple soak sessions protect nail integrity and reduce trauma.
• Smooth residue gently by hand
Use a soft buffer to remove remaining traces without thinning the nail.
• Finish with strengthening treatments
Reinforce nails with nourishing oils and repair treatments.
Also Read:- How to Put on a Duvet Cover: A Complete Guide
How to Remove Gel X Nails Safely
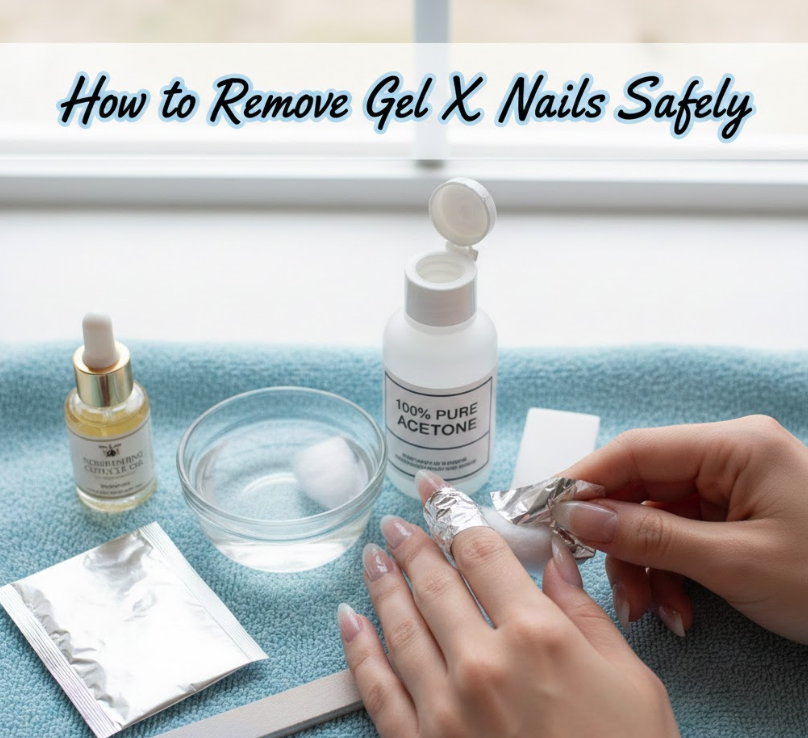
Safety is the foundation of successful Gel X nail removal. This method integrates best practices used by licensed nail technicians.
Detailed Explanation
Safe removal prioritizes nail health, skin protection, and long-term results. It avoids shortcuts that may cause immediate or delayed damage.
Step-by-Step Build Points
• Work in a well-lit, calm environment
Good visibility reduces mistakes and encourages careful technique.
• Avoid rushing the process
Hurrying leads to forceful removal and nail plate injury.
• Listen to your nails
Pain or resistance signals the need for more soaking or rest.
• Use gentle materials only
Soft tools and non-abrasive buffers protect the nail surface.
• Practice consistent aftercare
Moisturizing and strengthening treatments aid recovery.
• Give nails time to breathe
Avoid reapplying enhancements immediately after removal to allow healing.
Also Read:- How to Put on Cufflinks: A Step-by-Step Guide
Conclusion
Knowing how to remove Gel X nails safely is essential for preserving nail health and preventing long-term damage. Whether you choose to remove them at home, without acetone, tools, or drills, the key lies in patience, proper preparation, and gentle techniques. By following expert-approved methods and prioritizing nail care before and after removal, you can enjoy beautiful, healthy nails without compromise.
FAQs
Can I reuse Gel X tips after removal?
No, Gel X tips are designed for single use and lose integrity after removal.
How long should I wait before reapplying Gel X nails?
Ideally, wait 7–10 days to allow natural nails to recover fully.
Is acetone always necessary?
No, but it is the fastest method. Non-acetone methods work with more time and care
For More Updates Visit: Biomagazine